
how to use milking machine for cows
Manual milking takes plenty of time and labor and may introduce contamination to raw milk. A pulsating milking machine is a practical solution for small and medium dairy farms. This article shares the full standard milking workflow: pre-milking inspection of cows and equipment, teat preparation, cup attachment, milking monitoring, post-milking teat disinfection, and machine cleaning. We also cover hygiene and udder health tips, and recommend matched livestock equipment for your dairy farm management.
Hand Milking VS Machine Milking
Many small farm owners still rely on hand milking. It is slow and labor-intensive after long hours of work. Worse, improper hand milking may bring dirt and bacteria into fresh milk, which affects milk quality and shelf life. According to FAO’s good dairy farming practice guide, milking hygiene and stable animal mood are two core factors to guarantee raw milk safety.
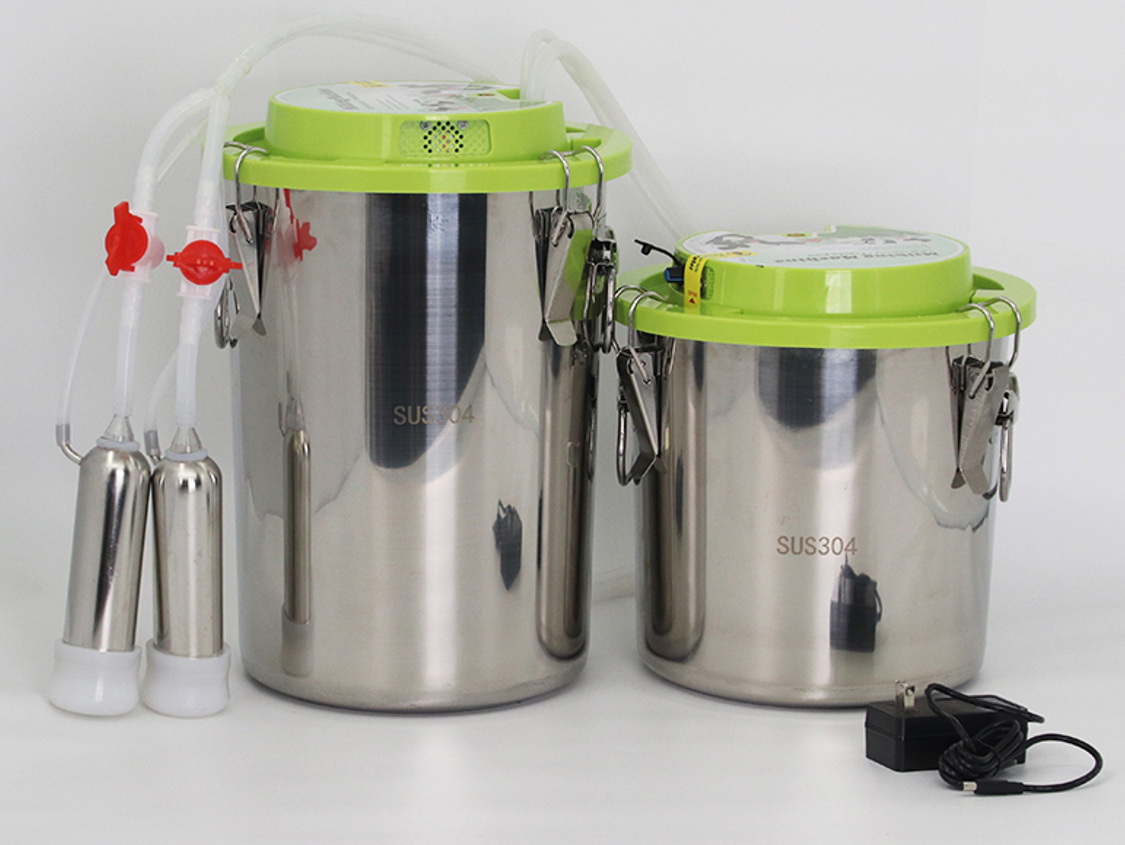
Switching to a pulsating milking machine can solve these pain points. Our milking machine series adopts a pulsating bionic sucking mode, which simulates natural calf sucking movement. It can gently massage the udder while milking, avoiding udder injury. For farm owners looking to upgrade their full breeding infrastructure, you can check out our livestock automatic feed and water line system to reduce daily feeding and watering workload.
Step 1: Pre-Milking Inspection & Teat Preparation
Before you start milking, follow the user manual to assemble all parts of the milking machine completely. If the cow feels nervous and restless, use a comb to brush its coat to calm the animal down. A calm animal gives a better milk release effect, as Teagasc dairy farming tips mention.
Check cow health status first: Check the udder carefully. Do not milk cows with swollen, hot, painful, or injured udders. Cows under medication without a finishing withdrawal period, within 7 days after calving, or diagnosed with mastitis should not enter the milking area.
Check milking equipment: Inspect teat cups, hoses, and milk collectors. Make sure all parts are clean, free from cracks, air leakage, or blockage. Start the vacuum pump as required and confirm stable vacuum and normal pulsator operation.
Udder cleaning and pre-milking test: Clean the udder and teats with warm water between 35~45°C, then apply pre-milking teat disinfectant and keep it for 15 to 20 seconds (we have dedicated teat dipping cups). Wipe dry with disposable paper towels; use separate towels for each cow. Hand-strip 2-3 squirts of milk to check for clots, flakes, or watery milk. If milk looks abnormal, report to your vet, milk this cow separately, and store milk independently.
When your barn needs a stable drinking and feeding supply for the whole herd, our farm feed water pipeline system helps maintain clean drinking water for cows all day long.
Step 2: Attach Teat Cups & Monitor Milking Process
Once you confirm the milk quality is normal, get ready for cup attachment.
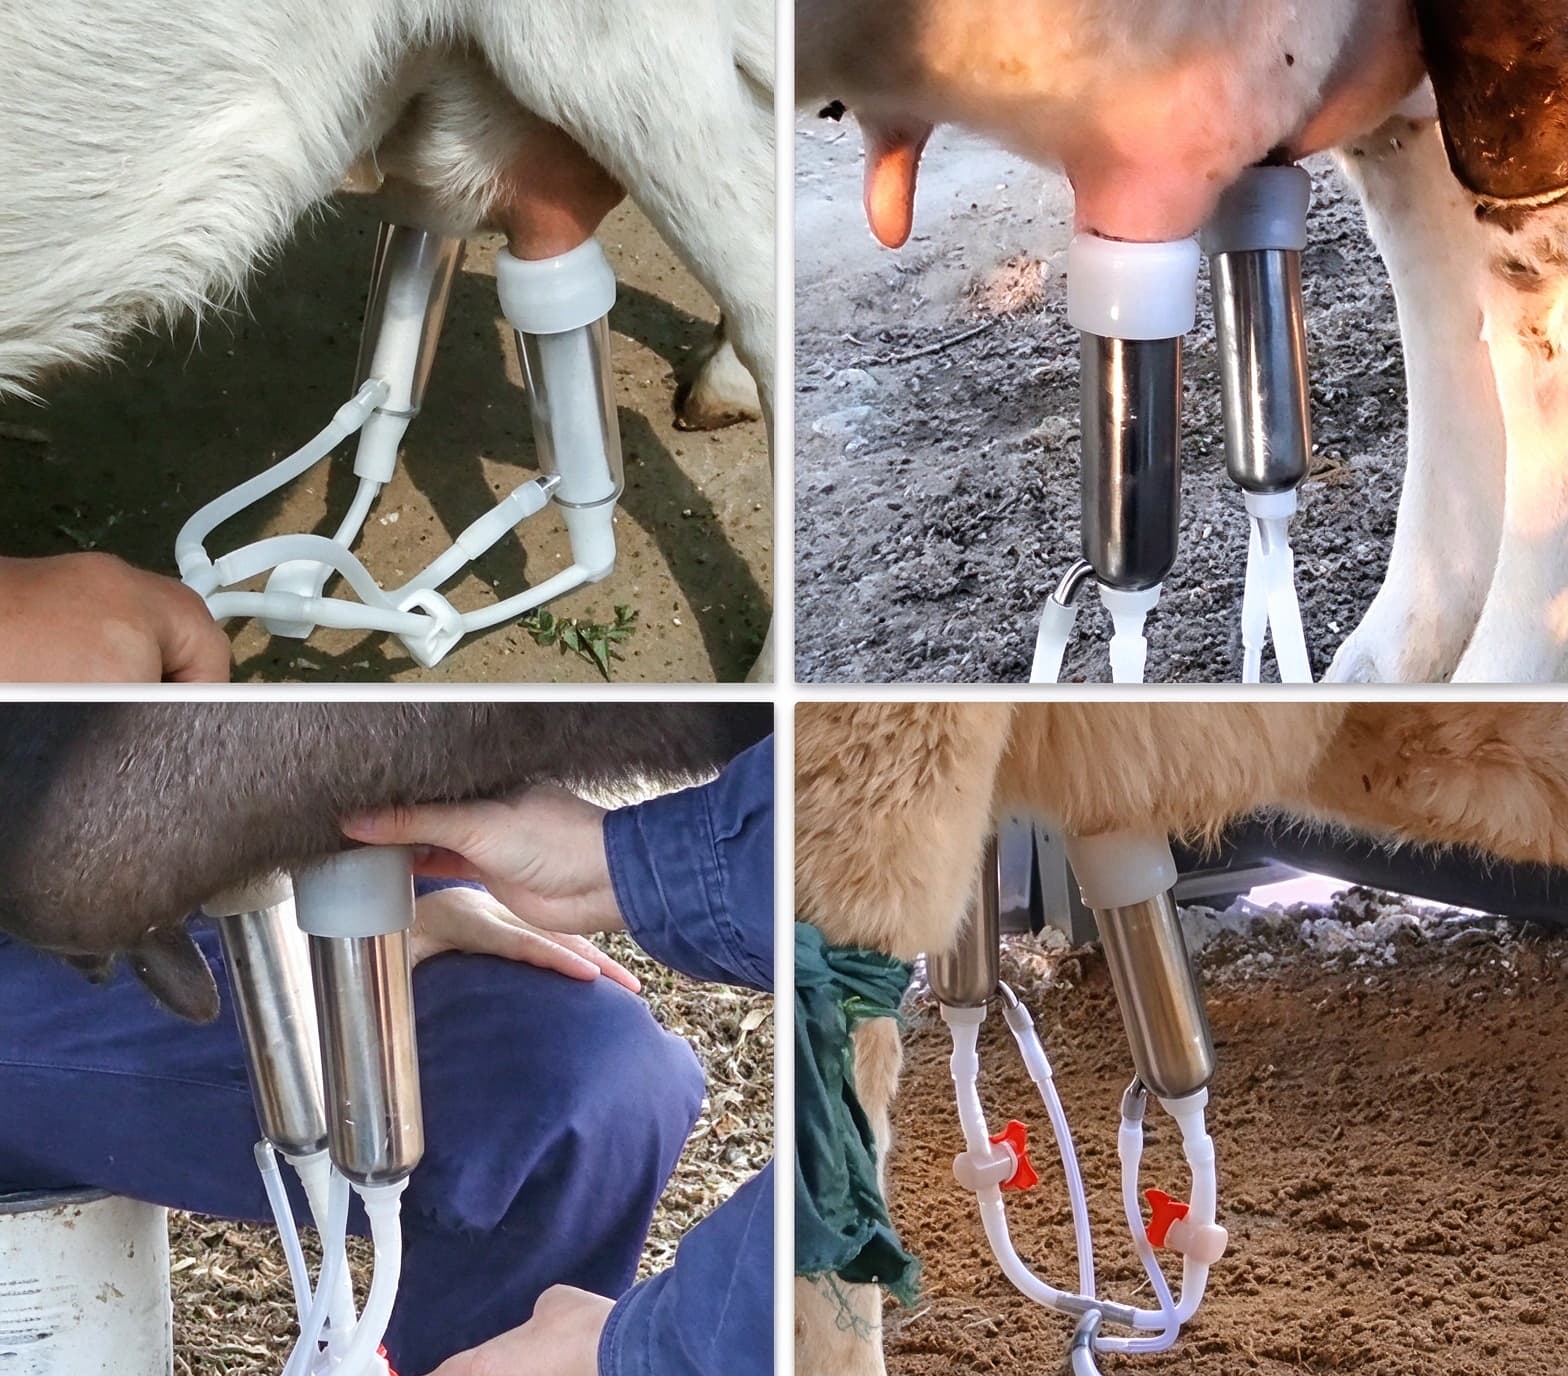
Before putting on teat cups, turn on the motor and start the milking machine. Let the unit run for around 1 minute to exhaust air inside the bucket. Open the air valve before milking. With the air valve open, gently place the teat cup onto the udder. Do not release your hand right away; wait until it sucks firmly, then let go.
Complete cup attachment within 45 seconds after effective teat stimulation. Place teat cups evenly at the bottom of the udder with a slight forward tilt to minimize air intake.
Check hoses are not twisted and teat cups stay firmly without falling off, confirm normal milk flow. If your machine has support arms, hang the cup group support arm after cup fitting.
Typical milking duration lasts 4–7 minutes. Avoid over-milking or dry milking. When milk flow drops noticeably, massage the udder from top to bottom gently. For auto-detach machines, the unit stops according to milk flow or a preset program. For manual removal, cut off the vacuum on the milk collector first, wait 2–3 seconds, then take off the teat cups; never pull them forcibly.
Do post-milking teat dipping right after cup removal. Make sure the disinfectant fully covers the teat end.
Step 3: Shut Down Machine & Complete Cleaning and Maintenance
After finishing all milking work: confirm all teat cups have been removed, shut down the milking unit, and then turn off the vacuum pump following the manual.
Clean the pipeline after every milking shift with alkaline wash. Acid wash should be done every two days. Always follow the equipment manual and local sanitation standards for cleaning temperature and chemical concentration. Rinse thoroughly with clean water after washing and drain residual water inside pipes and containers. If the machine stays unused longer than 96 hours, re-clean and sanitize before next use.
Keep operation records: log water temperature before and after cleaning, flushing duration, concentration of alkaline and acid detergent. Regularly check vacuum pump oil level, rubber spare parts, and air inlet of milk collectors.
For long-term farm operation, stable equipment reduces breakdown risk. If you want to build a full set of automated breeding setup, pair your milking equipment with our automatic livestock feed water line to improve overall farm efficiency.
Advantages of Our Milking Machine Models
Our milking machines adopt a pulsating bionic sucking design, mimicking a lamb's sucking motion. It delivers a gentle massage to the udder and prevents udder injury. It greatly saves time and labor, and the collected milk stays clean. Milk flows directly into the stainless steel bucket. The stainless steel tank is corrosion-resistant and easy to rinse after use. The milk tube is made of food-grade silicone, safe for contact with raw milk.
Final Milking & Maintenance Tips
Always follow the official manual for operation. Do not keep the teat cup attached after milk is finished. Clean and sanitize all silicone tubes and the stainless bucket after each use to avoid bacterial buildup. AHDB dairy guidelines remind farmers to keep consistent milking routines to protect udder health.
Check seals and vacuum system regularly to keep your milking machine working reliably for years.


